
- Home
- Products
- About Us
- Custom Services
- Solutions
- Resources
- News
- Contact
Views: 0 Author: Site Editor Publish Time: 2026-07-27 Origin: Site


Designing holiday contour lighting presents a specific challenge. Achieving crisp, professional-looking architectural outlines remains difficult when installations face harsh winter weather. Sharp lines easily turn sloppy under severe conditions. Buyers often default to cheap lighting solutions to save upfront costs. This approach typically leads to mid-season failures. It also creates a "dotted" effect. Visible diodes distract from the overall aesthetic. Sometimes lines sag heavily across the roof. You will soon discover the two primary commercial-grade solutions for outdoor contouring. We will compare traditional options against modern flex alternatives. This guide provides an objective, spec-driven breakdown comparing these options. You can use this resource to choose the right lighting. It helps you decide based on budget, climate, and desired visual impact.
Contour lighting differs significantly from general landscape illumination. General lighting highlights trees or pathways. Contour lighting serves a distinct architectural purpose. It outlines building perimeters perfectly. People view these outlines from great distances. The design must highlight architectural edges sharply. Continuous lines define success in this application area. Any break in the illumination ruins the visual geometry.
Installations face severe weather elements continuously. They must withstand heavy snow. Ice accumulation adds immense physical weight. Freeze-thaw cycles expand and contract the materials constantly. Casing materials cannot crack during these harsh transitions. Moisture ingress destroys electrical components immediately. You must demand high weather resistance.
Long rooflines suffer from voltage drop frequently. You must avoid this electrical issue entirely. The end of the run should remain as bright as the beginning. Consistent brightness ensures a professional appearance. Voltage drop causes noticeable dimming. Dimming at the tail end looks amateurish. Commercial properties cannot afford such visual inconsistencies.
Wind loads challenge structural integrity constantly. High winds pull violently on exposed rooflines. Your lighting must stay completely rigid. Sagging ruins the intended architectural outline. Secure mounting channels prevent this physical displacement. Installers must account for environmental stressors during setup.
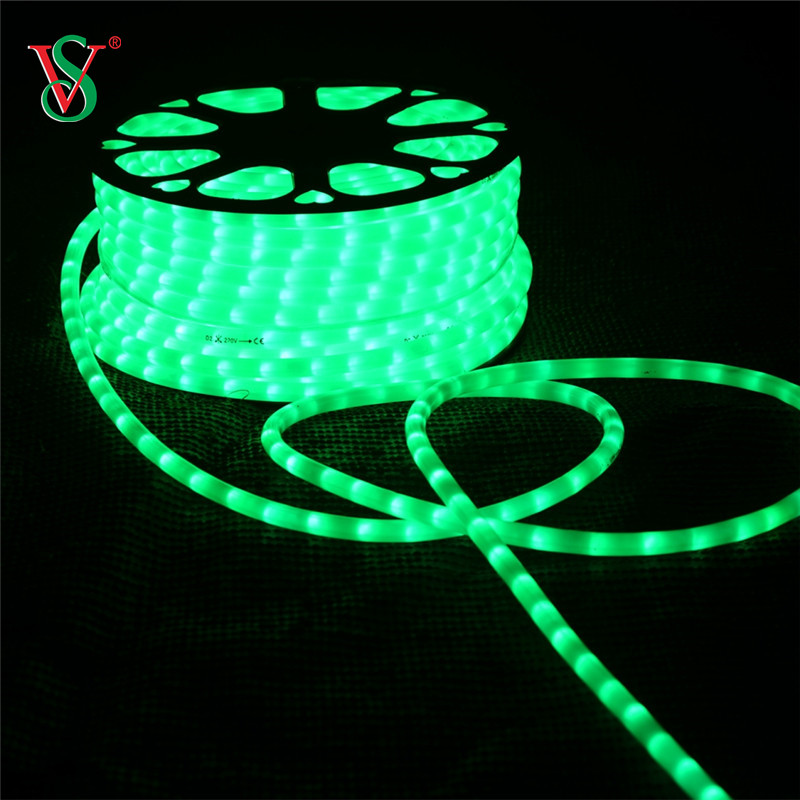
When examining structural definitions, we must look at the internal engineering. Let us explore the outdoor LED rope light first. Omnidirectional LED diodes sit inside a clear cylindrical tube. Manufacturers use PVC or plastic for this casing. They output 360-degree light naturally. You can clearly see internal wiring. Individual diodes remain highly visible to the naked eye. This creates the classic dotted appearance. The cylindrical shape allows easy bending. It rolls off a spool seamlessly.
Next, we define the modern alternative. A typical LED flex neon light uses a totally different construction. High-density LED strips embed within a thick profile. This opaque layer acts as a heavy light diffuser. Manufacturers utilize silicone or dense PVC. The shape is usually flat or dome-like. They provide highly directional light. You typically get 120 to 180 degrees of illumination. Some newer models offer 360-degree diffused light. It mimics traditional glass neon perfectly. The output looks incredibly seamless. No visible diodes interrupt the glowing line. The thick jacket protects the internal strips completely.
Utilitarian looks define traditional options. They create a nostalgic holiday vibe. The dotted effect is inevitable. Many buyers accept this for basic residential displays. However, professional venues demand more. They require architectural-grade illumination. Smooth illumination defines premium displays. High color rendering indexes matter greatly. Rich color saturation makes a huge difference. Comparing LED rope lights vs LED flex neon reveals a stark visual contrast. The former looks like a string of bulbs. The latter looks like glowing liquid.
Ultraviolet exposure degrades plastics rapidly. PVC options often yellow significantly. They become brittle after one or two seasons. Sun damage compromises structural integrity. Silicone options are heavily UV-resistant. Silicone maintains clarity for many years. It survives direct summer sunlight effortlessly. Both options achieve IP65 or IP67 ratings. This means they resist dust and water jets. However, end-caps demand professional sealing techniques. Installers use injection molding. Some prefer heavy silicone glue. Strict water resistance requires flawless end connections. Factory-sealed ends always perform best.
You can bend cylindrical tubes slightly in any direction. This makes them very forgiving during installation. You can easily wrap trees. You can drape them loosely over fences. Directional profiles bend differently. They usually bend on a single axis. You must choose between top-bend or side-bend profiles. Top-bend flexes up and down. Side-bend flexes left and right. You must specify the correct profile carefully. Precise planning accommodates 90-degree roof peaks. It also ensures clean architectural corners. Wrong bending damages the internal circuit board forever.
Material and Aesthetic Comparison
| Evaluation Feature | Traditional PVC Option | Modern Silicone Option |
|---|---|---|
| Visual Output Quality | Dotted, visible internal diodes | Seamless, glowing continuous line |
| UV Degradation Resistance | Low (Prone to yellowing over time) | High (Maintains original clarity) |
| Bending Characteristics | Omnidirectional, loose bending | Single-axis (Top or Side bend) |
| Waterproofing Maintenance | Easier DIY sealing | Requires professional injection caps |
Sagging ruins contour lines completely. Loose lighting looks highly unprofessional. Silicone options require continuous aluminum channel extrusions. These channels guarantee perfectly straight rooflines. They hold the thick material rigidly. These channels increase your accessory budget significantly. They also require more labor to mount. Cylindrical tubes install easily. Installers use simple P-clips. You must keep spacing tight. Tight spacing avoids unsightly drooping. We recommend placing clips every twelve inches.
We must evaluate power systems thoroughly. High-voltage 120V systems allow much longer continuous runs. You can plug them directly into wall outlets. They pose higher safety risks if cut improperly. Water entering a 120V line causes catastrophic shorts. Low-voltage 12V or 24V systems operate much safer. However, they require power injection every 16 to 32 feet. You need multiple power supplies.
Cutting lengths presents another major challenge. Standard options have long cut intervals. You might only cut every 30 to 36 inches. Exact architectural sizing becomes incredibly difficult. Premium options offer shorter cut increments. You can cut every inch sometimes. This allows highly precise alignments.
Installing in warm weather carries hidden risks. Both materials contract significantly in the cold. Thermal contraction stresses your electrical connections. The casing shrinks physically as temperatures drop. You should allow some slack during summer installations. Tight installations will snap in freezing weather. Let the material acclimatize before final mounting.
Follow these essential best practices during installation:
Scenario A focuses on large-scale commercial displays. Budget constraints play a massive role here. We strongly recommend the 120V traditional option. Fast deployment saves massive labor hours. You enjoy a lower cost per foot. The system handles 150-foot continuous runs easily. You do not need complex power supplies. It remains highly acceptable for distant viewing. Park perimeters benefit from this approach. The dotted effect disappears at 100 yards.
Scenario B focuses on premium residential outlining. High-end retail architectural detailing falls here too. We highly recommend the silicone 24V premium option. You demand flawless aesthetics. Close-up viewing requires dot-free lines. Custom roof peaks need exact sizing. A high-end boutique needs crisp lines. The higher return on investment justifies extra labor. It also justifies additional accessory costs. This particular LED decorative light elevates property value visibly.
Choosing between LED rope lights vs LED flex neon hinges on specific factors. Viewing distance remains crucial. Aesthetic requirements dictate your material selection. Climate severity also plays a massive role. Never compromise on IP ratings. You need a minimum of IP65 outdoors. Always factor in mounting channel expenses. Look beyond the raw lighting material cost. Proper planning prevents mid-season failures.
Consult a project specialist today. Calculate your exact voltage requirements before ordering. Request a material sample to verify quality firsthand. Test the bending axis yourself. Review your architectural corners closely. You can achieve spectacular holiday displays through careful specification.
A: Yes, but only at designated cut marks. Doing so voids factory IP ratings unless properly resealed with outdoor-rated silicone caps.
A: Yes, specifically silicone-extruded flex neon, which remains pliable in sub-zero temperatures, unlike PVC which can crack upon impact when frozen.
A: Low-voltage (12V/24V) systems are generally safe for DIY/handyman installation, but 120V systems—especially when customized or cut—should be handled or inspected by certified professionals due to shock/fire risks in wet environments.


